After ordering some exotic hermit crabs from Germany last spring I found myself in need of a second crabitat. After a lot of research I settled on a 75 gallon tank. I really wanted to build a vertical crabitat to give my crabs more climbing space. One I acquired a tank from Craigslist I began planning my build and creating my shopping list. Both are very important steps! I will attach my shopping list for any one who wants to use it.
First I gathered my existing supplies to see what I had to work with. 13 years of keeping hermit crabs results in a large collection of hermit crab stuff.
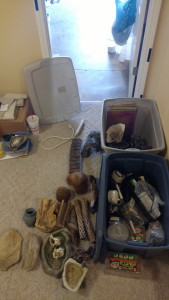
I bought this tank for $80 with some stuff included:
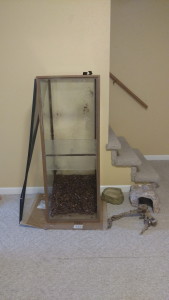
And then this happened:
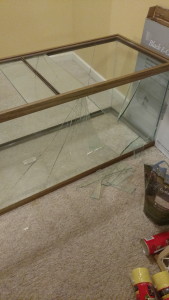
I still don’t even want to talk about the tank of betrayal. It’s gone and it’s time to move on.
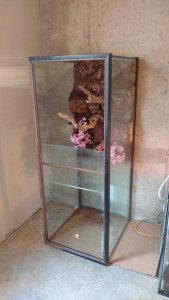
This is tank number two:
Planning out the foam background arrangement. You can silicone your items in place and let them cure overnight before starting the foam. I only applied silicone to the tree fern panels that are lying flat, everything else I just added the foam around to hold it in place.
Once I had my foam in place (this is two cans) I covered it with loose coco fiber before it began to dry. I didn’t press mine down but you may want to do that so you get heavier coverage. Wear gloves! This stuff is insanely messy and sticky. Let this sit 24 hours to harden. You can use crumpled newspaper in place of the flower pots and still plant flowers in them. I was concerned and small crabs finding gaps where I couldn’t see so I used the flower pots and siliconed the holes in the bottom closed. I used them doubled as they were thin.
Now it’s time to move the tank to it’s final resting place, the laundry room. I have it sitting on a thick piece of cardboard to protect the glass from scratching and it also fills the slight gap between the glass and floor created by the frame.
I was going to re-use one of the glass panels from the tank of betrayal as the bottom wall of the tank but it was just a tiny bit too big. My original plan was to use plexiglass (lexan) so I already had 3 pieces cut to fit. I decided to use two pieces because the thicker lexan is ridiculously expensive. This actually will be a better solution for my natural false bottom.
Natural false bottom! I don’t use a false bottom in my 150 gallon tank and have never used one. They are currently gaining popularity but it’s a complex building process that has to be done properly or it becomes a death trap for crabs. So I’ve taken that as a challenge to find a better way. My first plan was to use hydroballs as the base but a concern was voiced in regards to the hydroballs eventually melting into a mess. There was also some concern about a bacterial bloom. So then I researched further and discovered growstones! They are better in every way! I opted to put these in this tank.
“Growstones are breakthrough, high-performance growing mediums that are 100% recycled glass and 100% American made. Our highly porous, chemical and toxin-free hydroponic growth mediums and soil aerators are engineered to deliver proper air and water balance in the roots without the danger of overwatering. They can be customized to fit a wide range of plants and climates as well as different growing systems.
Growstones’ Revolutionary Growing Mediums and Horticultural products are:
Highly porous and provide high aeration to roots
100% recycled and 100% American made
Not strip-mined like Hydroton and perlite
Non-toxic and chemical free
Lightweight, Dust-free
Impossible to overwater
pH neutral after preparation
Proven yields
Non-degradable
Non-compacting
Reusable
Inert”
The next layer is pre-moistened spaghnum moss. I should have moistened it the night before because I had to wait awhile before adding it to the tank. The idea is that in a water spill flood the moss will help absorb water along with the growstones and help keep some air flow by preventing the sand from filling is around the growstones.
UPDATE: I’ve removed the photos of the moss layered. DO NOT DO THIS!!! It is not safe! http://crabstreetjournal.org/blog/2017/02/23/substrate-method-update-moss/
Mixing up the substrate! I tried a 5:1:1:1 ratio (sand, dry coco fiber, crushed oyster shells, coco chunks) but I like the 10:1:1:1 ratio better. The playsand from Lowe’s is really nice and it’s cheap. I did not add any water to the sand at this stage.
I’ve now added the double layer water pools (easy flood insurance), the heat mat, insulation, flowers, baskets, coco huts and lights. I have a regular reptile bulb and an LED Strip Light that changes colors. Looks pretty sweet!
Enjoy some additional views of the tank at this stage:
Still with me? Great! My order from the Isopod Connection arrived. I ordered decor items and two batches of isopods (roly poly bugs). I also received my second sensor for my wireless weather station. It can have up to 5 sensors with one base so I have a sensor in each tank.
The final step is adding the door. I bought hinges with the intent of mounting them with silicone. However the silicone wouldn’t stick to the lexan, so I used super glue. Probably if you scuffed up the lexan it would hold. I also bought some weather stripping to fit inside the door. The door handle is a child proof door latch from Munchkin.
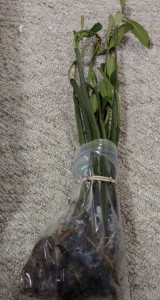
I also ordered some live mangrove seedlings for both tanks, hopefully I can keep them alive! They are water cleaners and from a hermit crabs natural habitat.
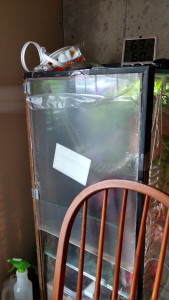
One last photo and then a short video of the tank.
There are two additional videos of this tank on our Periscope archive on Katch.me:
75 gallon vertical crabitat reveal
75 gallon vertical crabitat final
How much did this whole build cost me?
Crabitat supplies price list spreadsheet


